WARNING: Picture light, and word heavy! This is for my fellow fitting nerds . . .
Before I get started on this post, I want to mention that this morning I realized I'd left out some information from my first Inari post that I think is pretty important. I've gone back and edited that post, but I thought I'd add it here too:
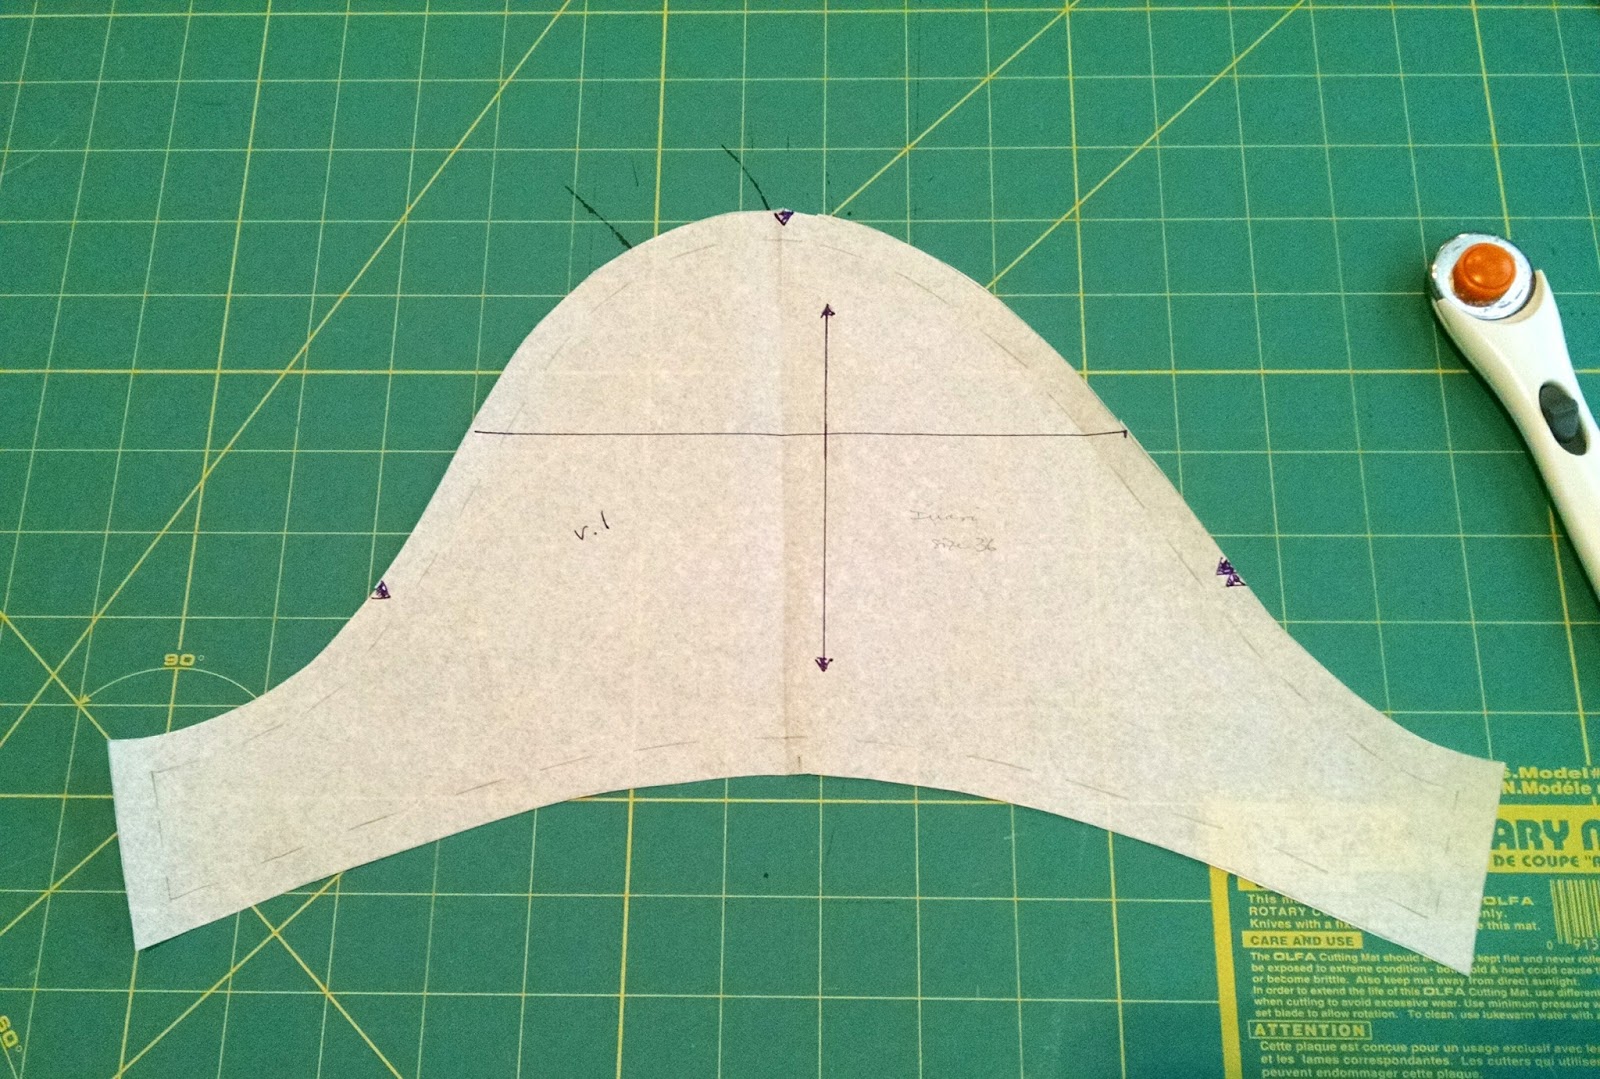
You may be wondering why I went to all the trouble of cutting along the seam line for the front and slashing and spreading for the back, rather than just adding some extra to the outside of each cutting line. Sometimes adding to the edge of the pattern works, especially on straighter edges and for smaller additions, and where two adjoining pieces will add the same amount. But in my experiments with fitting over the last few years, I've found that I often make things easier for myself by maintaining the length of the original seam line. In both the adjustments above, the length of the seam line remained unchanged, and therefore everything matched up like the original when I went to sew the pieces together. So more and more, I tend to adjust along the seam line when possible.To illustrate this point, imagine 2 concentric semi-circles, let's say 1/2" apart. If you could straighten those two lines out, you'd find that the inside line is shorter than the outside line. Now imagine that those two semi-circles are pattern pieces with the inside line being the seam line and the outside line being the cutting line, and you need to add more room. If you just add, say another 1/4" to the outside, your new seam line moves out to correspond - but it is now longer than it was originally! If you did not make a corresponding adjustment to the piece it will be sewn to, they won't fit together.
So, seam line adjustments seem like more work - and they are a little - but they often save me a bunch of frustration. And I get to feel like I really know what I'm doing ;-)
OK, so now today's post begins :-)
I think about fitting All. The. Time. It's one of those things where I didn't know that I didn't know, but now that I do know . . . I was perfectly happy for a long time buying and sewing clothes that fit OK, but not great. But once I started to learn how to fix some of the areas that weren't fitting well, I became kind of obsessed with it.
Add to that the fact that I'm a "Princess and the Pea" kind of girl - seriously, the other day my foot was bothering me and I finally discovered that there was a flax seed in my shoe. A flax seed!! I'm very sensitive to sound and touch - I hate getting my hair cut because it hurts when the hairdresser washes, combs and styles it! So when my clothes are too tight, or dig in certain areas, or shift so that I have to keep yanking them back into place . . . I'm not a happy camper. And that is the main reason that I do all the fitting I do.
So for quite a while, I've been trying to pay attention to how my clothes feel when I'm wearing them, and apply that to changes I might make when sewing. Scooping that bit out of the front armhole on the Inari is a good example: that feeling had been bugging me for a while on many garments, and it finally filtered through to my brain how to fix it.
I received a few comments both here and on Instagram to the effect of "Oy - if I have to make that many adjustments, I'm just not going to make that thing!!" I get that, I really do! The thing is, from an aesthetic point of view, a lot of the adjusting I do isn't strictly necessary. It's just what I do to make myself feel more comfortable in my clothes.
I'm going to give some examples of that in a bit, but first I think it might be helpful for you guys to know my starting point. In addition to having 3 different sizes for bust, waist and hips (not at all uncommon) I also have a LOT of asymmetries in my body - more than most, I believe. For instance, one of my legs is longer than the other (which creates a tilted pelvis, which creates differing hip curves right and left) and the shorter leg has a longer foot to compensate! I have a prominent shoulder blade on the right side only, so if I were going to REALLY make a perfectly fitting garment, I'd have to create different patterns for the right and left sides of my body. I could go on . . .
To illustrate, here are the adjustments I do - I think you'll be shocked by the sheer number!
I almost always have to do:
1. Forward shoulder adjustment (and corresponding sleeve head adjustment)
2. Broad back adjustment
3. Sway back adjustment
4. Larger hip adjustment
5. Shorten sleeves
6. Shorten length for skirts, dresses and pants
I often also have to do:
7. Low round back adjustment (a.k.a. dowager's hump - oy!)
8. Outwardly rotating elbows adjustment
9. Shallow upper chest adjustment
10. Prominent thighs/full seat adjustment for skirts or pants
11. Knock knees adjustment for pants
12. Narrow upper chest adjustment
Yeah, it's a lot. I don't have to do all of these all the time, but I always have in the back of my mind that this is a menu of changes I might have to choose from.
I've noticed that how much fitting I have to do depends not only on the style of the garment, but also on the brand of pattern I'm using. I'm sure that comes as no surprise to most of you. While I do enjoy the challenge of fitting, I'm not a glutton for punishment. So for instance, I mostly avoid Colette patterns these days because they just take too much re-inventing of the wheel to work for me. I've found that patterns by Burda and Named are often really good starting points for me, i.e. need less adjusting. I'm having a love/hate relationship with Style Arc at the moment because I love the designs, but have had mixed results with the fit.
Most of the time when I'm trying out a new pattern for a woven, I'll do a tissue fitting first. The tissue fitting doesn't always diagnose all the issues, but it's a good start for me. For knits and stretch wovens, obviously that won't work, since paper doesn't stretch. So I generally make up a garment using a similar, less expensive fabric.
In both cases, after I've made my first garment, I wear it a bit and then go back and tweak the fit. My problem is that when I make something I like, I usually want to make five more Right Now!! After I made my Inari dress the other day, I really had to stop myself from immediately cutting out another.
Now, like I said, a lot of the adjusting I do isn't really necessary for appearance. Once I started to learn to fit, I found that I look at people on the street and assess the fit of their garments AND my reactions to their garments. I often can see where they'd need adjustments, but you know what? It's mostly no big deal - they look fine. And I know that I do too, in a garment that doesn't have optimal fit.
Here are some examples pulled from things I've made over the last few months. Last week I bought the Grainline Lark pattern. The very first thing I did was to trace out the pieces in size 2, grading to 4 at the hip and removing 2" from the bottom. I also did a small forward shoulder adjustment, 3/8" I think. Here's that top:
Pretty nice, huh? It's still a little long, but that's because I used a very drapey rayon jersey. The next day I made another one, also navy blue, in cotton/lycra and the fit was much closer and shorter. (I couldn't get a picture because it was too cloudy that day.)
Then I got curious: what would this pattern look like on me completely unadjusted? So I decided to find out. I made the third one with no adjustments except for the body length - I'm only 5'4" after all! This one is made from rayon/lycra jersey. And it looks fine! It was also comfortable enough for me to wear it for 2 days.
Here's another example. I'm exploring French jackets lately. I made my first one in January, all by machine, to see if I liked the style on me before going whole hog with the handmade kind. I used a Burda magazine pattern (03/2012 #109) and did a quick tissue fit, after which I only did a small forward shoulder adjustment. Here's jacket #1:
Looks great, IMO! And feels good. But after wearing it a couple times, I decided to refine the fit. For version 2, I narrowed the shoulders 1/2" (unusual for me), took a 1/4" tuck out of the upper chest and added 1" overall to the hem width. Very slight adjustments that produced an even better fit. Good enough that I also used this pattern for the leather jacket I made earlier this month:
These are to illustrate my point: do I really NEED all the adjustments? Not necessarily. But do they make the garment look and feel better? Definitely. And I truly enjoy the challenge of figuring out what each new pattern needs. But if I didn't enjoy it, I could totally skip it and it would be fine.
So for those of you that don't enjoy going to these lengths with fitting - don't! Unless a garment is uncomfortable or doesn't fit at all, don't worry about it! I'm perfectly happy wearing RTW pants and jeans that have wrinkles at the back of the legs. But if I'm making pants or jeans, I do what I can to remove those wrinkles. It's an interesting pastime for me.
I'll end with another picture of my Inari dress, version one. I like it; it's comfortable enough. I will certainly wear it even though the fit isn't spot on, because the fabric is so pretty.
Are you a fitting nerd too? I'd love to hear your thoughts on these matters.